Quick start: your first pipeline
Build a small change-data-capture pipeline, check it and export it. It takes about ten minutes.
You will design: a PostgreSQL CDC source writing to an orders topic, a Flink SQL statement that enriches the orders, an output topic, and a Snowflake sink with a dead letter topic for its failures.
1. Create a project
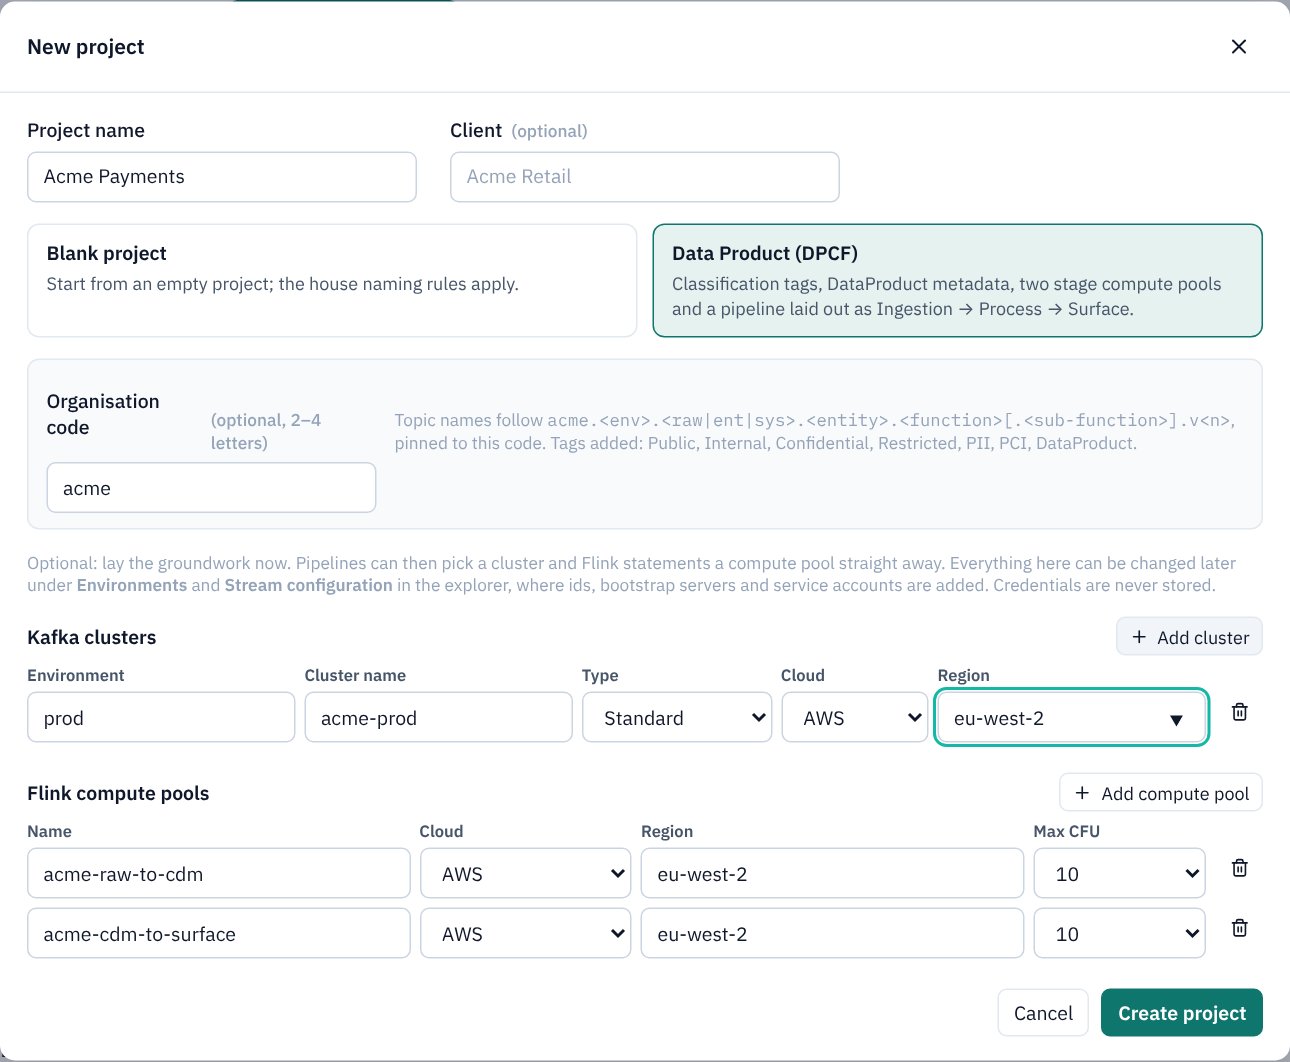
- Choose File → New project…
- Type a project name; it is the only required field. Add the client if you like.
- Keep Blank project for this tutorial. (Data Product (DPCF) starts you with governance tags, a naming rule and a three-layer pipeline.)
- Optionally add a Kafka cluster (environment, name, type, cloud, region) and a Flink compute pool. You can add them later from the explorer.
- Choose Create project. KPD creates the project folder.
- A new blank project opens in Storyboard mode, for sketching the story first. This tutorial builds the pipeline itself, so click Engineer at the far left of the toolbar, then New pipeline, and give it a name.
2. Add the first assets
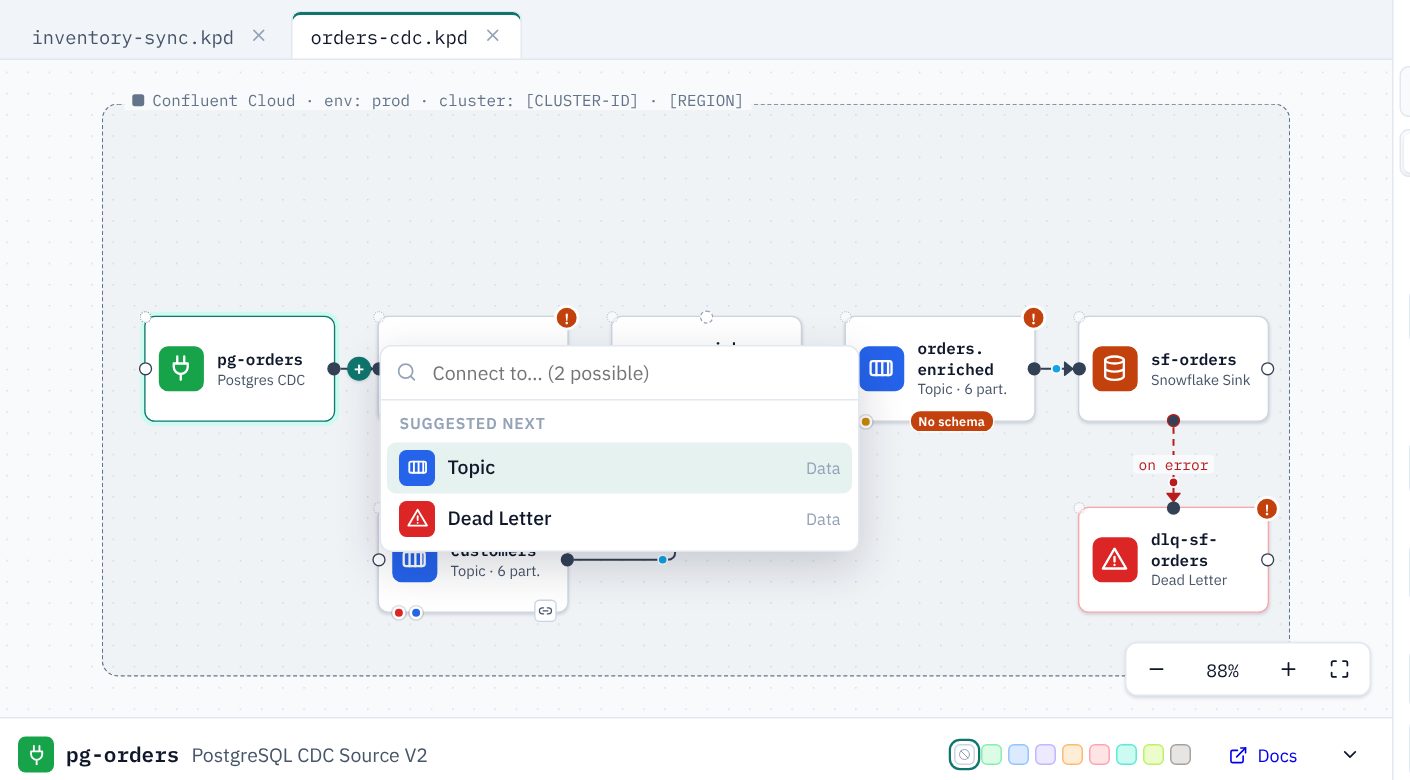
- A new pipeline opens with a Start your pipeline card. (To begin with the database itself, click Start from a system; see Starting from the system.) Click Add a source, type postgres and choose PostgreSQL CDC Source V2. (You can also drag it from the Palettes panel on the right.)
- Select it. A + appears beside its output: click it and choose Topic. KPD places the topic beside the source, already connected. This is quick add.
- With the topic selected, click its + and choose Flink SQL, then add a second Topic after the statement, and a Snowflake Sink after that.
- Select the sink: its red + is the error output. Choose Dead Letter to route failed records to a dead letter topic.
3. Describe the assets
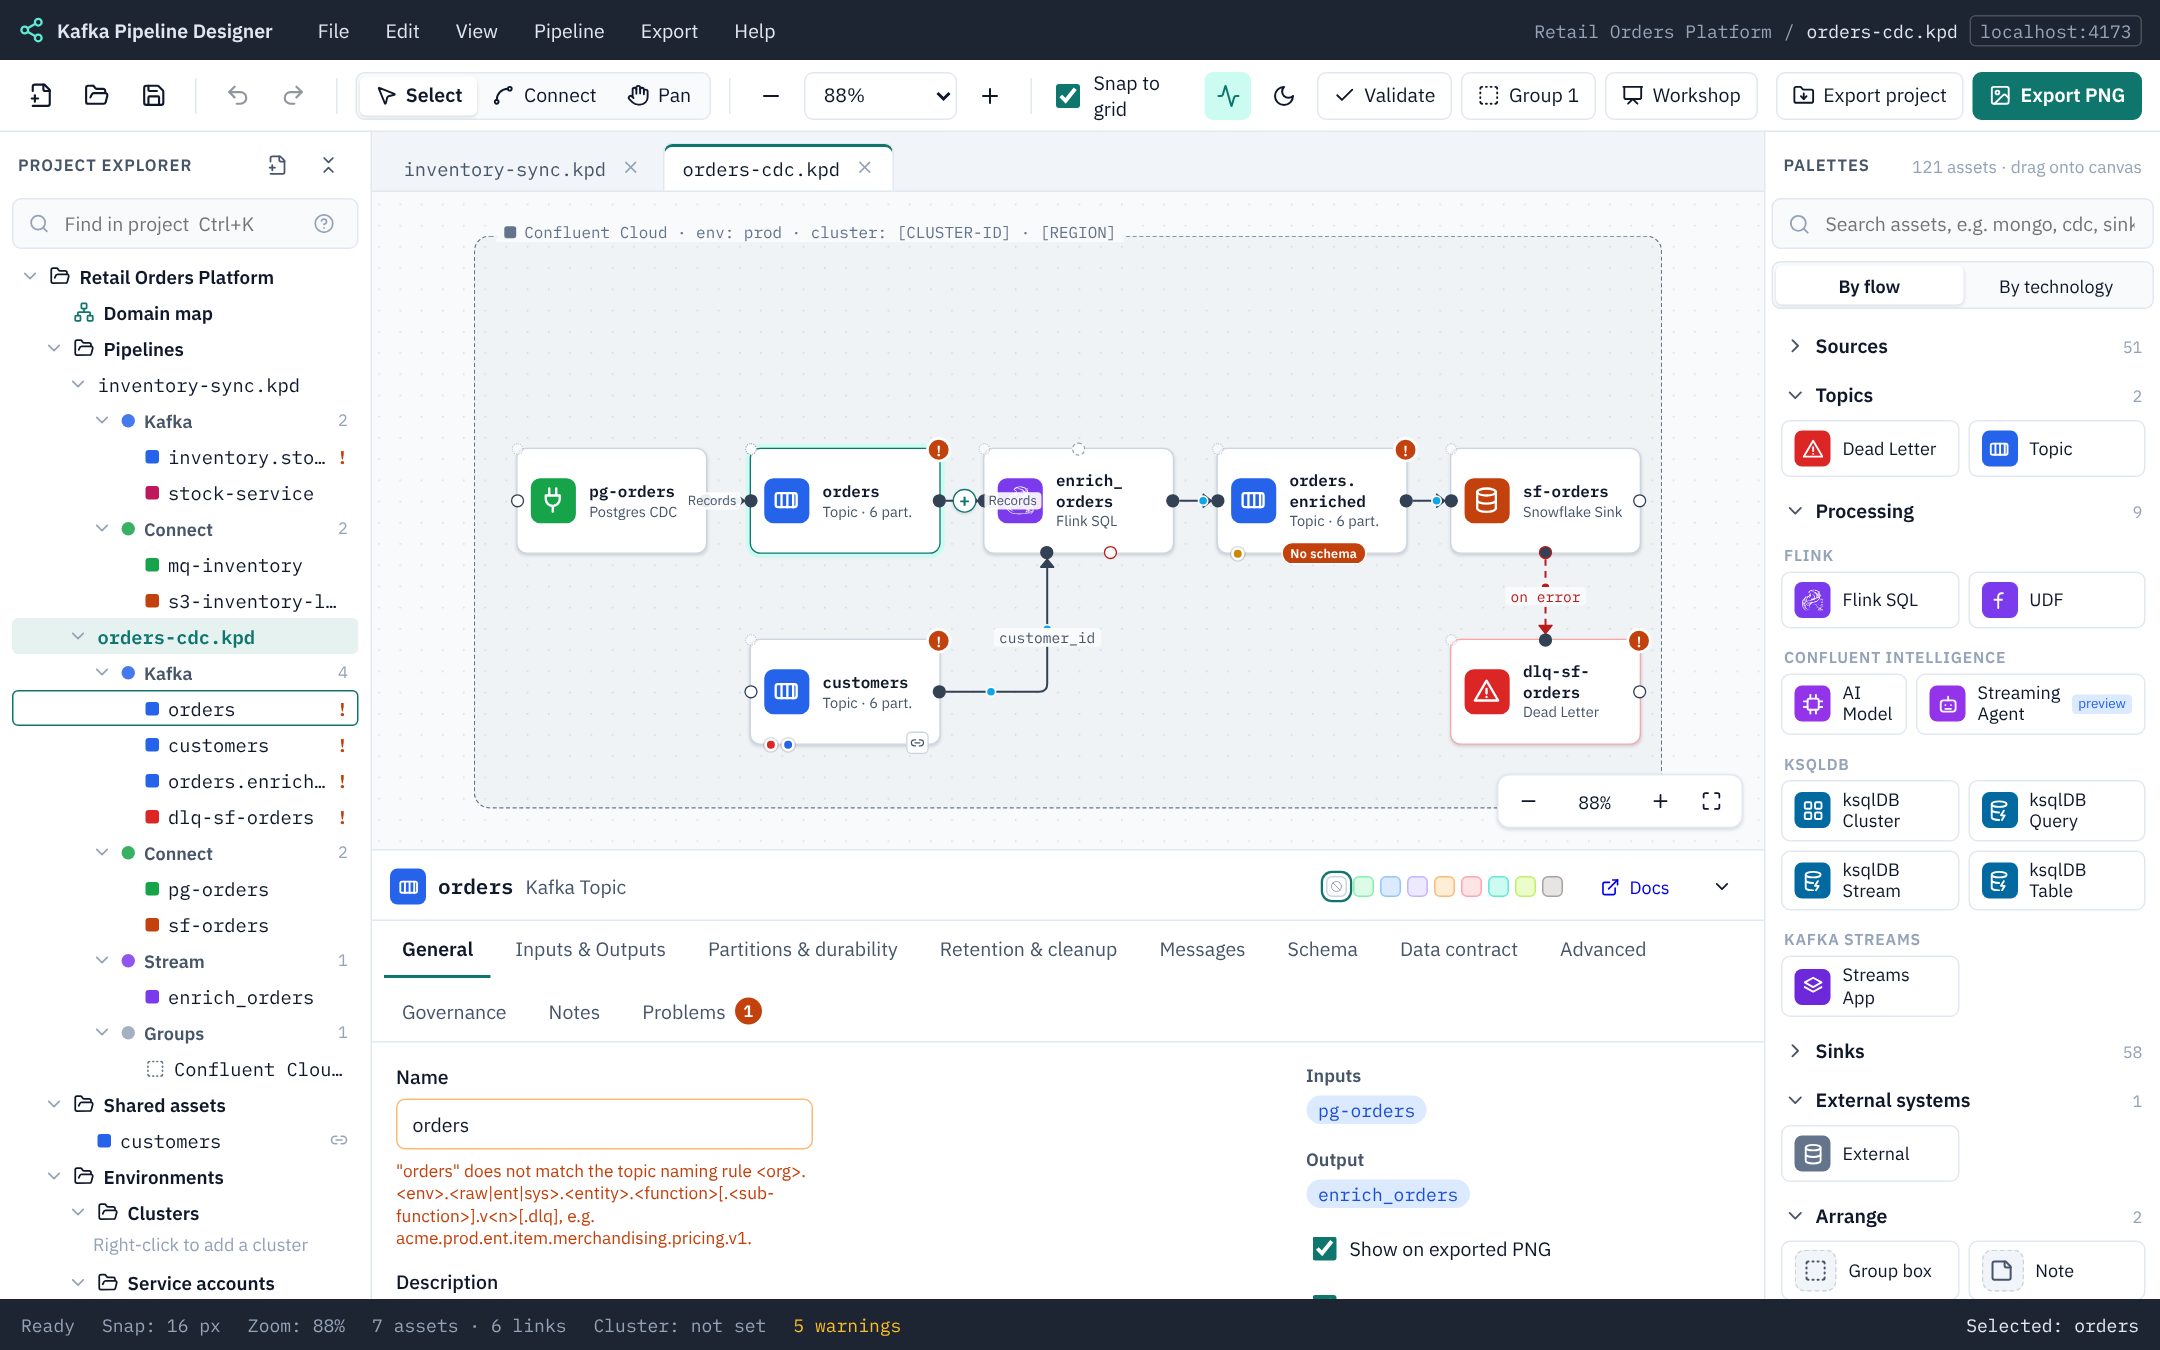
Click an asset and use the properties panel underneath the canvas. Its tabs come from the asset's palette.
- Name the first topic
orders(or a name that follows your naming standard), set its partitions, and on its Schema tab create or pick a value schema. - On the Flink statement's SQL tab, write the statement, and on General pick a compute pool.
- On connectors and Flink, pick the service account the asset runs as.
4. Check it
KPD validates continuously. Badges on assets and the count in the status bar show errors (red) and warnings (orange); the Problems tab lists them, and clicking one selects the asset. The toolbar Validate button checks the whole project, and says whether Terraform would generate. Typical first warnings: a topic name that doesn't match the naming rule, a topic without a schema, a pipeline without a cluster. See Properties and validation.
5. Save and export
- Save with Ctrl/⌘+S. Pipelines are files in the project's
pipelines/folder. - Export PNG (toolbar) writes a transparent picture with a legend, ready for a document or slide.
- Export → Technical export gives a Markdown or CSV table of every asset and its settings.
- Export → Export to Detailed Design Template writes a full design document for the whole project.
- Once a cluster and its ids are set, Export → Terraform… generates the infrastructure as code.