1. Create the project
A new project from the Data Product (DPCF) template, with three clusters and two compute pools.
Part 1 of 10 in the Hello World tutorial · Follow this part in the guided wizard · Printable version
Your browser blocked the wizard window. How to allow it, or open the wizard in a new tab.
A project is a folder that holds everything for one piece of work: its pipelines, schemas, clusters, accounts, tags and rules. You start every design by creating one.
Open the New project dialog
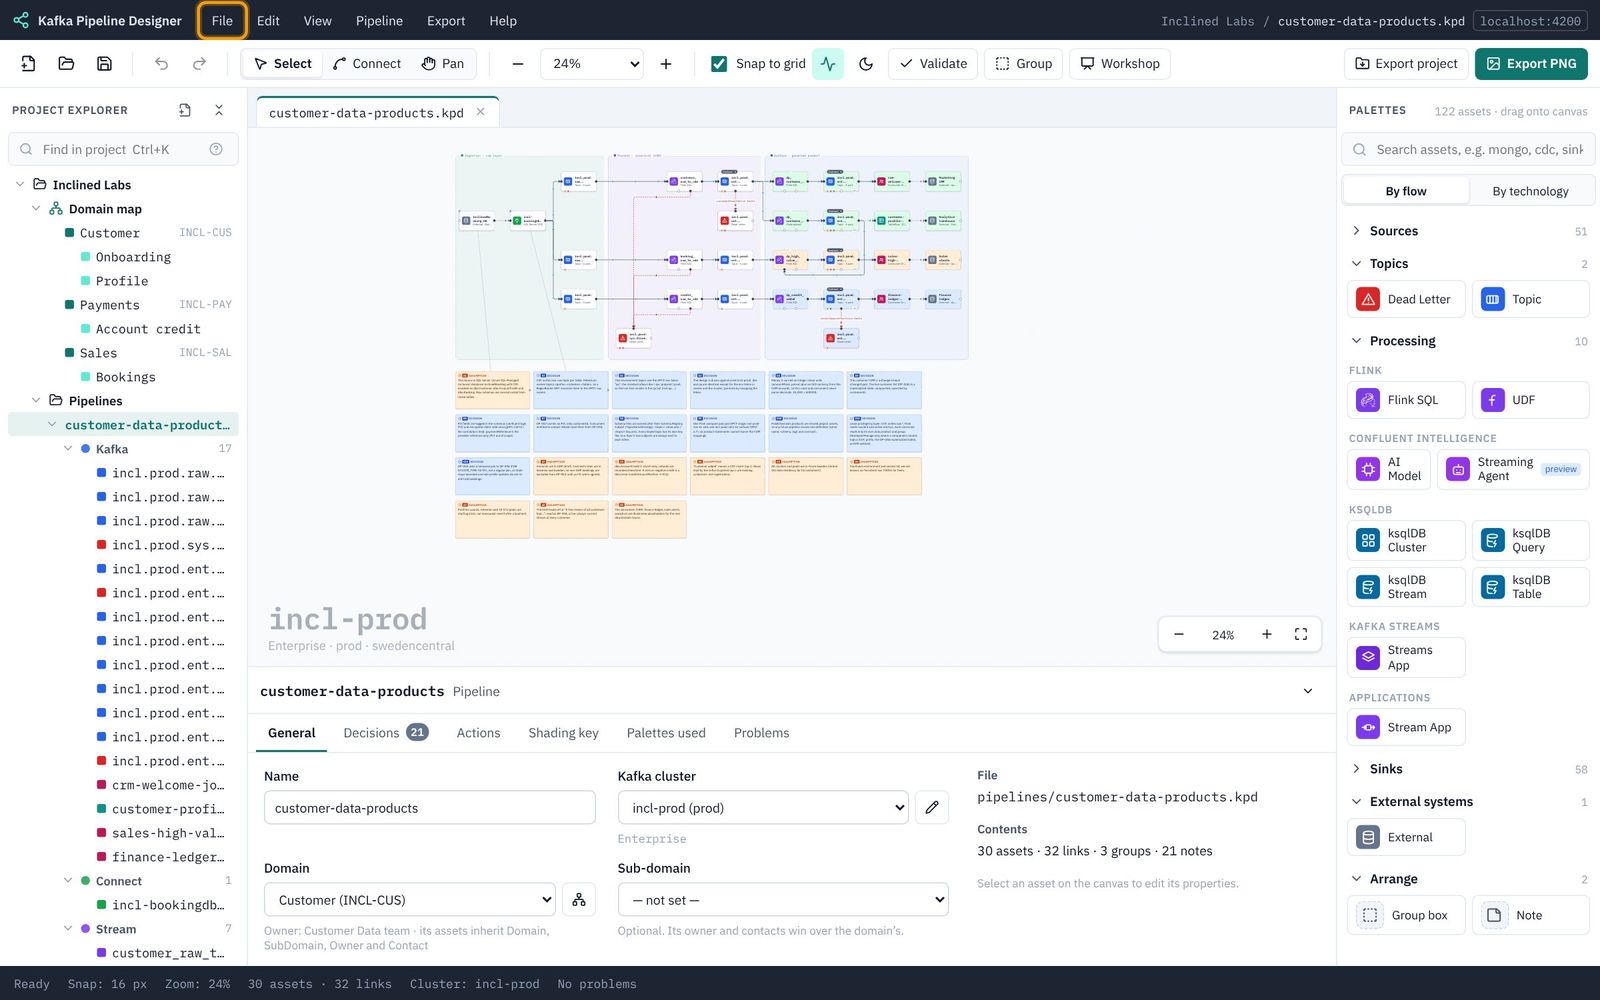
- Open KPD. You see whichever project you had open last (here, the Inclined Labs sample), or the welcome screen if this is your first time.
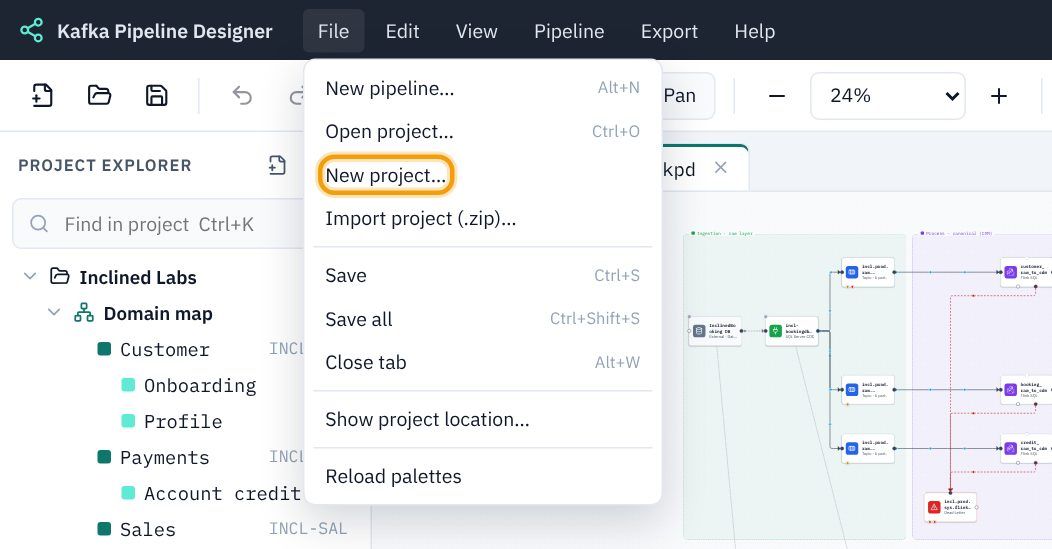
- Click the File menu at the top left.
- Choose New project…
Name it and pick the template
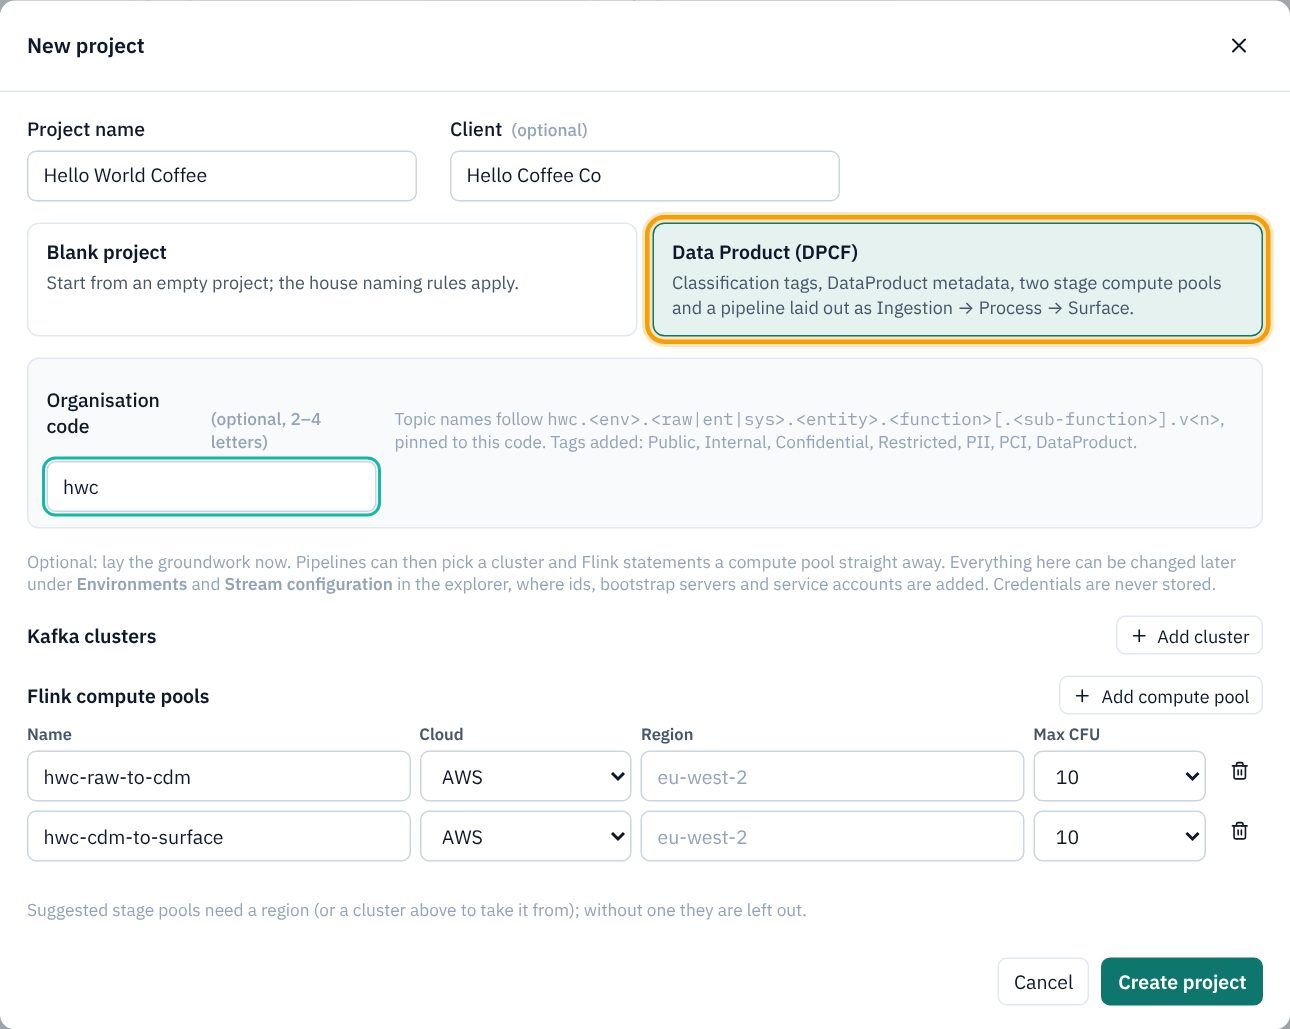
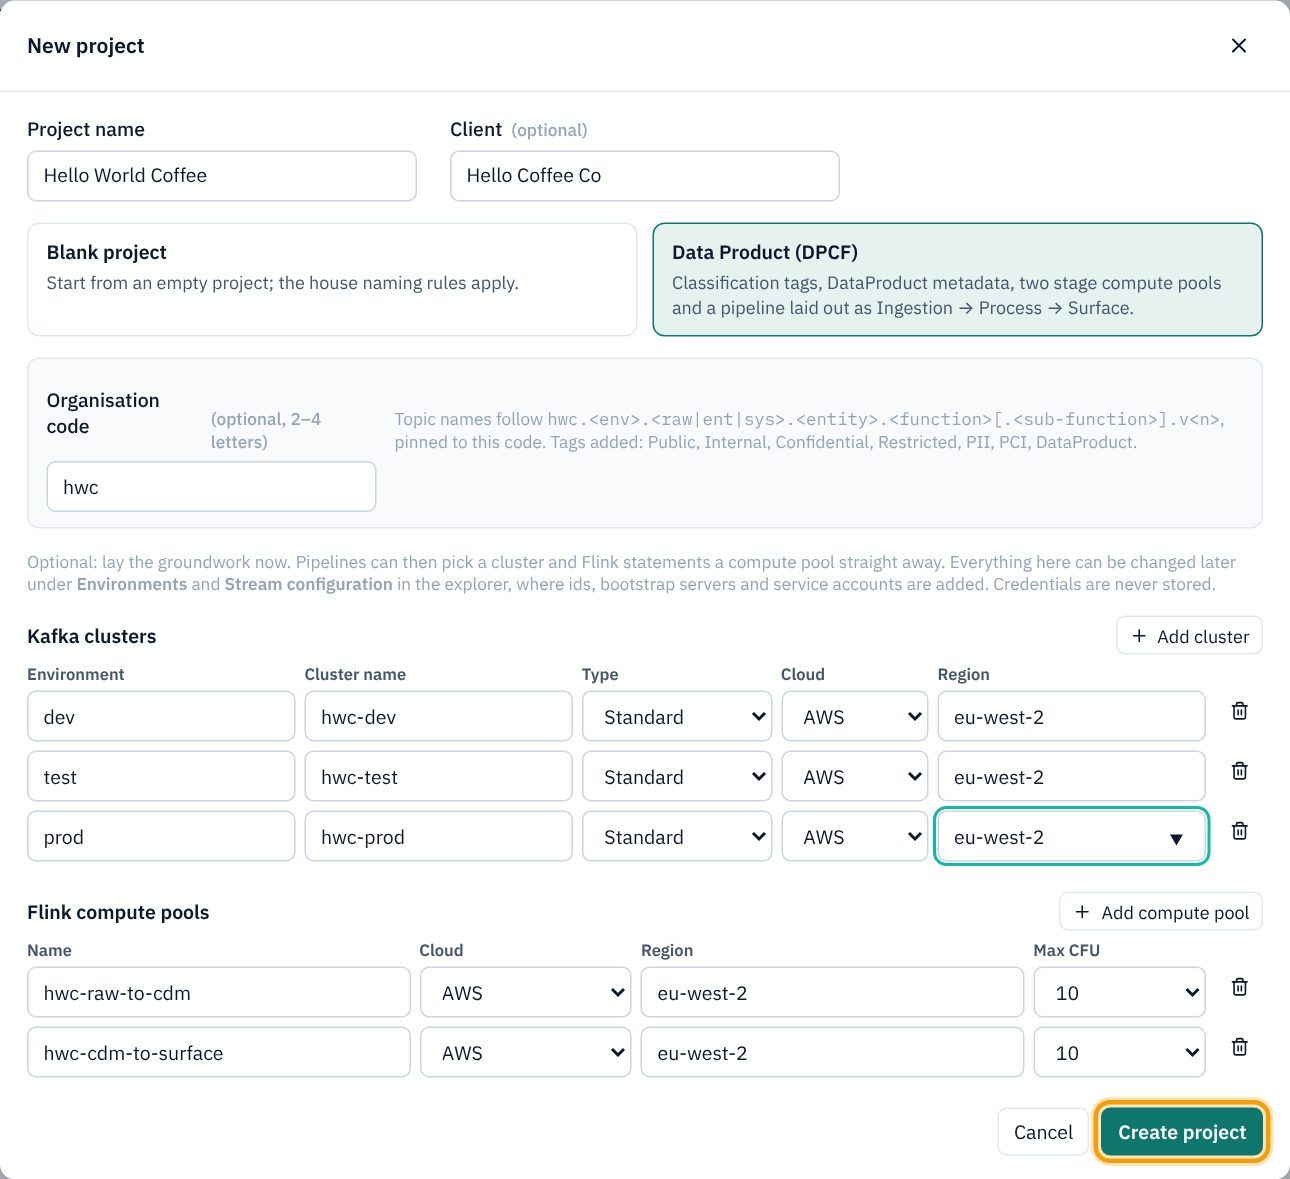
- Project name: type
Hello World Coffee. This is the only required field. - Client: type
Hello Coffee Co. It appears on the design document and the Terraform README. - Click the Data Product (DPCF) card. The template gives you classification tags, a DataProduct catalogue metadata definition, the DPCF topic naming rule, two suggested compute pools, and a first pipeline laid out as Ingestion → Process → Surface.
- Organisation code: type
hwc. Every topic name will start with it: the hint shows the patternhwc.<env>.<raw|ent|sys>.<entity>.<function>.v<n>.
hwc.hwc.prod.raw.order.shopdb.v1 means: organisation hwc, environment prod, layer raw (as captured; ent is the cleaned enterprise layer and sys is for system topics such as dead letters), entity order, function shopdb (where it came from), version 1. KPD checks every topic name against this rule as you type. See Topic naming standards.Add three clusters and check the pools
Lower down the dialog you can describe your Kafka clusters and Flink compute pools now, so pipelines can use them straight away. Part 3 looks at them in more detail.
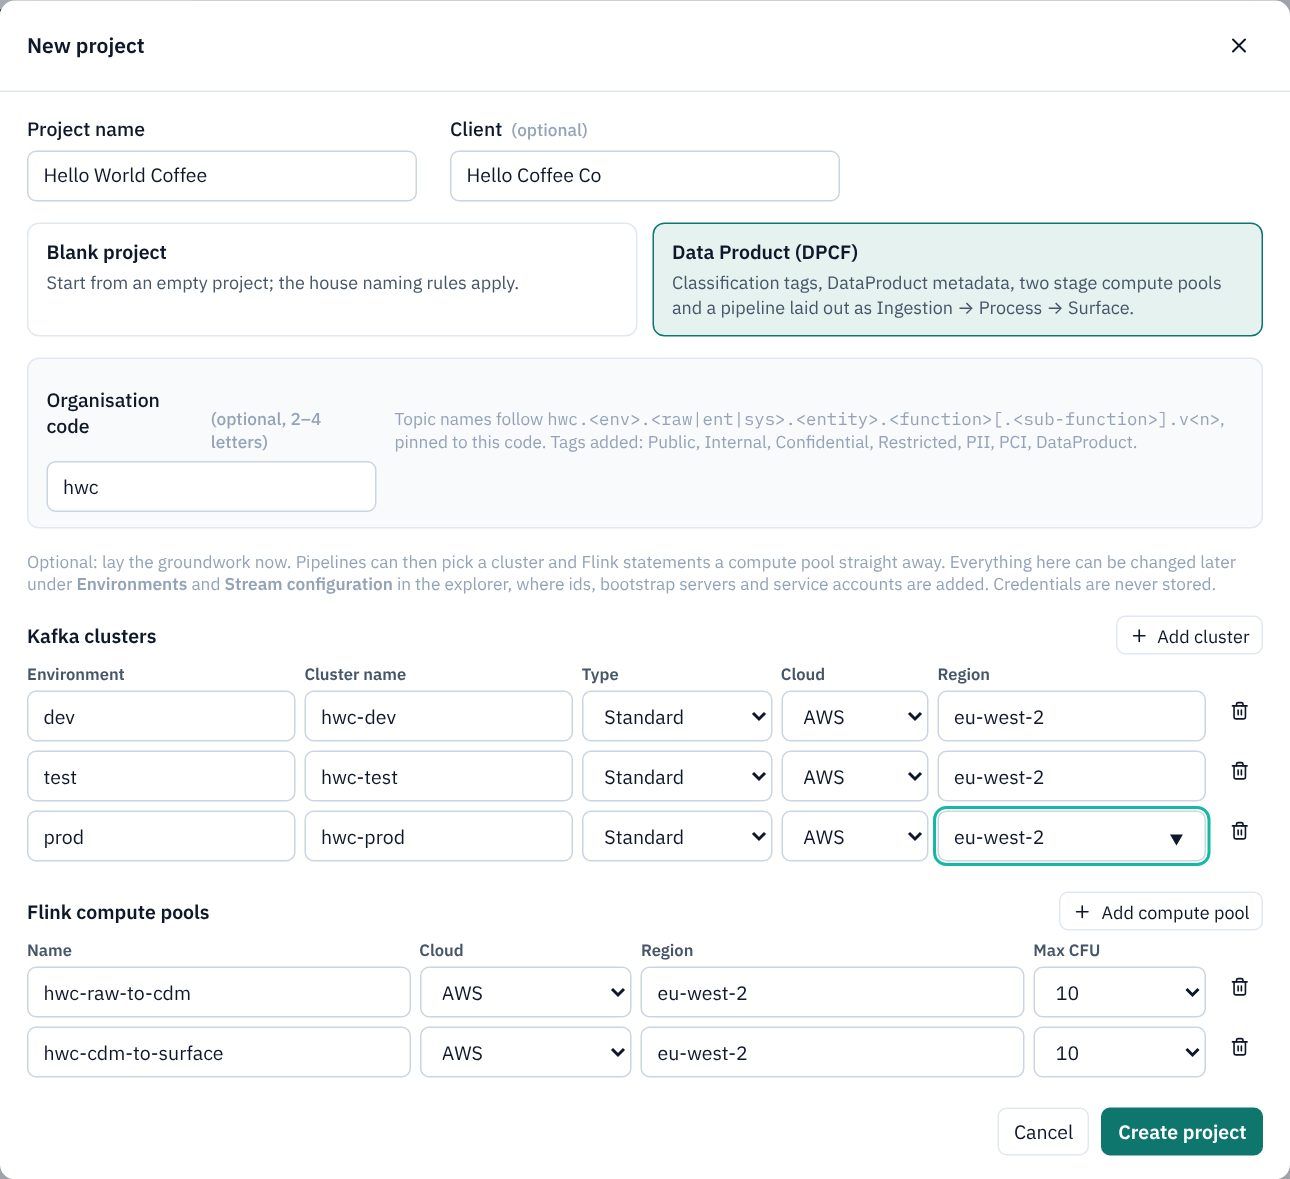
- Under Kafka clusters, click Add cluster three times to get three rows.
- Fill them in like this:
Environment Cluster name Type Cloud Region devhwc-devStandard AWS eu-west-2testhwc-testStandard AWS eu-west-2prodhwc-prodStandard AWS eu-west-2 - Under Flink compute pools the template has already suggested two pools, one per processing stage:
hwc-raw-to-cdm(raw to canonical) andhwc-cdm-to-surface(canonical to data products). Leave them at 10 max CFU. Once a cluster has a region, the pools take it.
- Click Create project.
A quick look around
KPD creates the project folder and opens its first pipeline, data-product.kpd, with the three layer boxes already drawn and a Start your pipeline card in the middle.
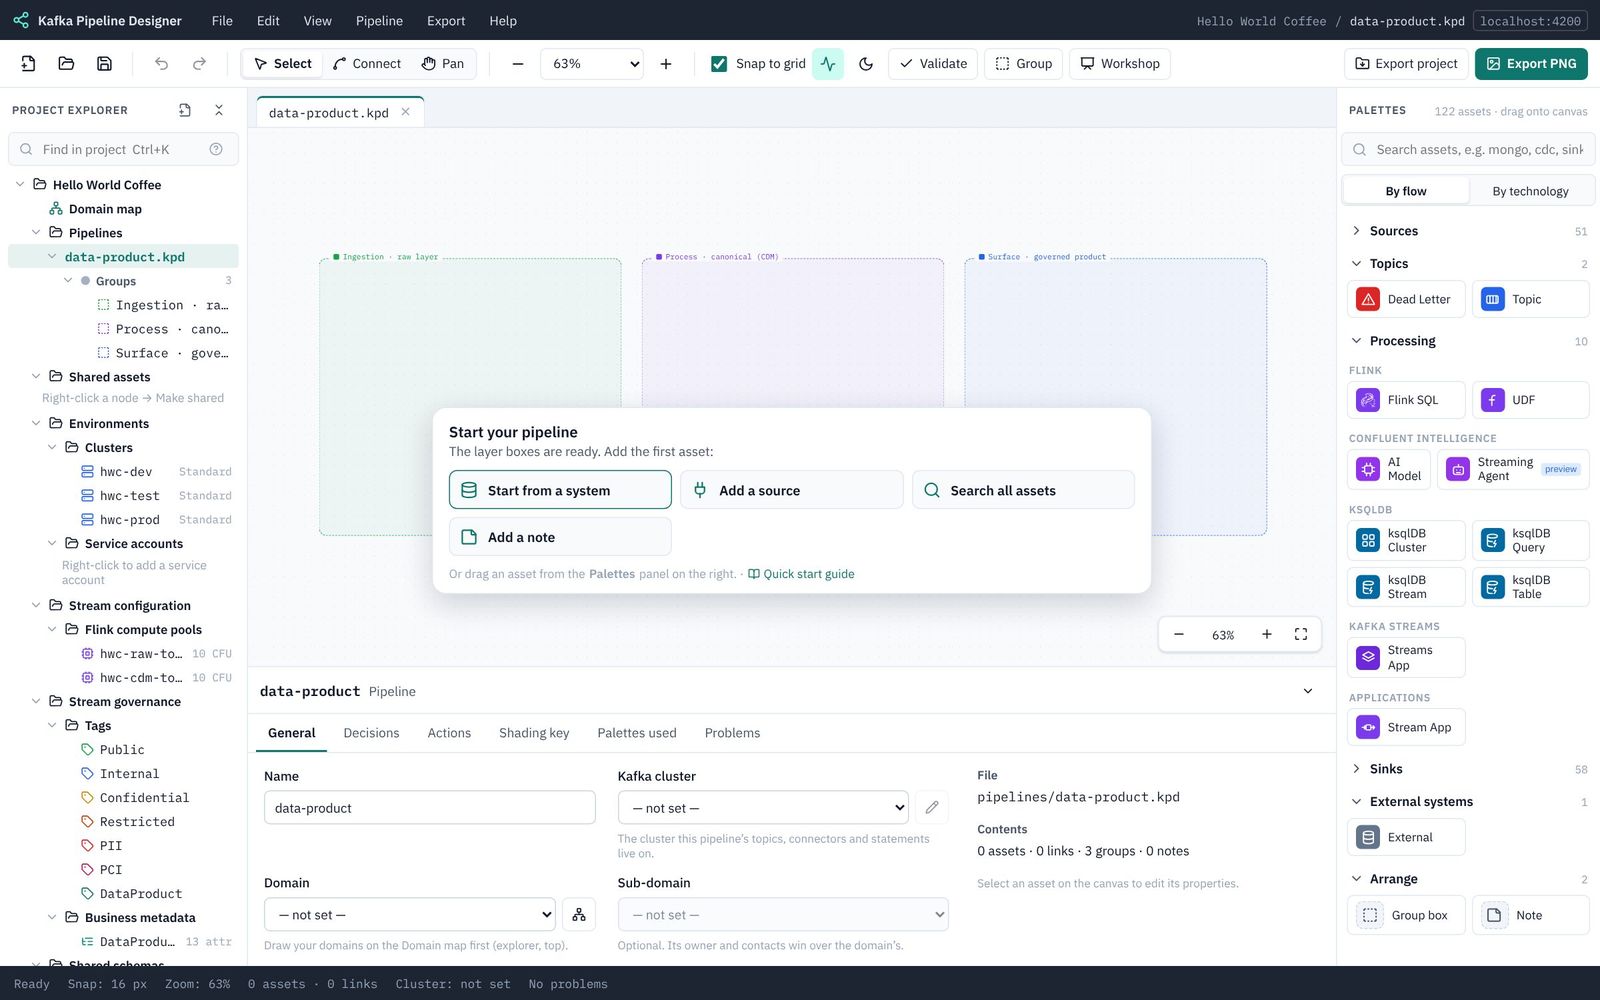
- Project explorer (left): everything in the project. Under Environments you can already see the three clusters; under Stream configuration the two compute pools; under Stream governance the tags (Public, Internal, Confidential, Restricted, PII, PCI, DataProduct) and the DataProduct business metadata, all from the template.
- Canvas (middle): where you draw the pipeline. The three dotted boxes are groups for the DPCF layers.
- Properties panel (bottom): the settings of whatever is selected. With nothing selected it shows the pipeline itself.
- Palettes (right): every kind of asset you can add. You will mostly use quick add instead (Part 4).
Press Ctrl/⌘+S to save. Next: 2. Draw the domain map.